
Common hardwood problems and repairs
Most hardwood damage falls into a few patterns. The symptom points to the cause, and the cause decides the repair.
| Symptom | Likely cause | Typical approach |
|---|---|---|
| Surface scratches | Grit, furniture, pets | Finish touch-up, screen and recoat, or refinish |
| Deep gouges or dents | Dropped objects, heavy furniture | Replace individual boards |
| Dark or black stains | Water or pet urine reacting with the wood | Replace affected boards; surface sanding rarely removes them |
| Cupping (edges higher than centre) | Moisture from below or high humidity | Fix the moisture source, let the floor stabilise, then assess |
| Crowning (centre higher) | Sanding a cupped floor too early, or moisture from above | Assess moisture; boards may need replacement |
| Seasonal gaps | Normal winter drying | Humidity control; filling is rarely recommended |
| Squeaks and loose boards | Loose subfloor or fasteners | Fasten from below or face-nail and fill |
| Buckling (lifting off subfloor) | Significant water event | Cause repair, then partial or full replacement |
Find the cause before replacing boards
Cupping, staining and buckling are moisture stories. A dishwasher leak, a plugged exterior drain, a humid crawlspace or an overly humid home in summer can all push moisture into the boards. Replacing boards before the source is fixed and the floor has dried simply moves the problem.
Moisture meter readings across the damaged and undamaged areas help show whether the floor is still wet and how far the damage extends.
How board replacement works
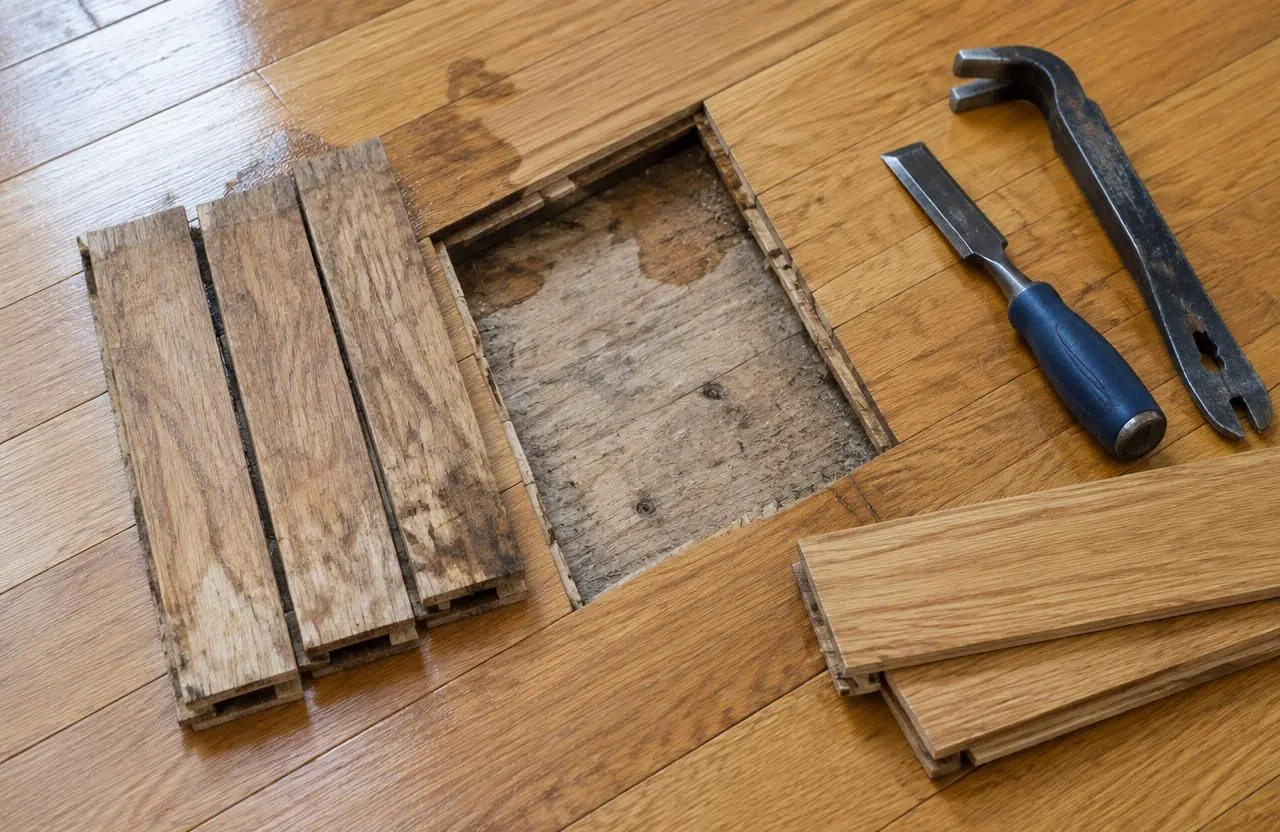
Damaged boards are cut out without disturbing their neighbours, and new boards are woven in — staggered into the existing pattern rather than cut in a straight line — so the repair does not leave an obvious patch. The new boards are fastened or glued, then sanded and finished to match.
With prefinished floors, an exact replacement from the same product line makes a near-invisible repair possible. With older or site-finished floors, the repaired area usually needs sanding and refinishing, sometimes across the whole room, for the colour to blend.
Matching older Ottawa floors
Floors in older homes in neighbourhoods like the Glebe, Westboro or Old Ottawa South often use widths and thicknesses no longer stocked. Options include sourcing reclaimed boards, borrowing boards from a closet and replacing those instead, or milling new boards to match.
Wood also changes colour with age and light, so even the right species will look different until it is finished and has had time to age alongside the rest of the floor.
Filling the gap after a wall comes out
Removing a wall leaves a strip of missing flooring and often a change in board direction. A clean repair weaves new boards into both sides rather than adding a threshold. This is common alongside load-bearing wall removal and kitchen renovations, and is easiest to plan before refinishing the connected rooms together.
Squeaks, soft spots and loose boards
Squeaks usually come from movement between the boards, the fasteners and the subfloor. Access from below, such as an unfinished basement ceiling, allows the subfloor to be fastened up into the floor. From above, specialty fasteners can be driven and concealed. Soft spots can indicate subfloor damage that needs to be opened and replaced.
When repair is not the best answer
If damage covers much of a room, the subfloor itself is compromised, or the floor has already been sanded too thin, replacement may be better value than repair. The assessment should compare both honestly.
What shapes repair cost
Small repairs vary widely because access and matching drive the effort.
- Number and location of damaged boards
- Availability of matching material
- Cause investigation and drying time
- Subfloor repair under the damaged area
- Whether the repaired area or whole room needs refinishing
- Moving fixtures, appliances or furniture
Common questions
How do you repair scratches on a hardwood floor?
Light scratches in the finish can be touched up or handled with a screen and recoat. Scratches into the wood usually need sanding and refinishing, or board replacement if they are deep.
Can you match my old hardwood?
Usually closely, by matching species, width and thickness through stock, reclaimed boards or milling. The repaired area often needs refinishing to blend in colour.
How do you fix cupped hardwood?
First fix the moisture source and let the floor dry and stabilise. Sanding a cupped floor too soon can cause crowning later. Some floors flatten; badly damaged boards are replaced.
Should winter gaps in hardwood be filled?
Usually not. Seasonal gaps close as humidity returns, and filler can crack or be squeezed out. Humidity control is the better fix.
Can squeaky hardwood floors be fixed?
Often, by refastening the subfloor from below or using concealed fasteners from above. The best method depends on access.
Will a hardwood repair be visible?
A woven-in repair with matching material and refinishing can blend well. New wood may look slightly different at first and evens out as it ages.