
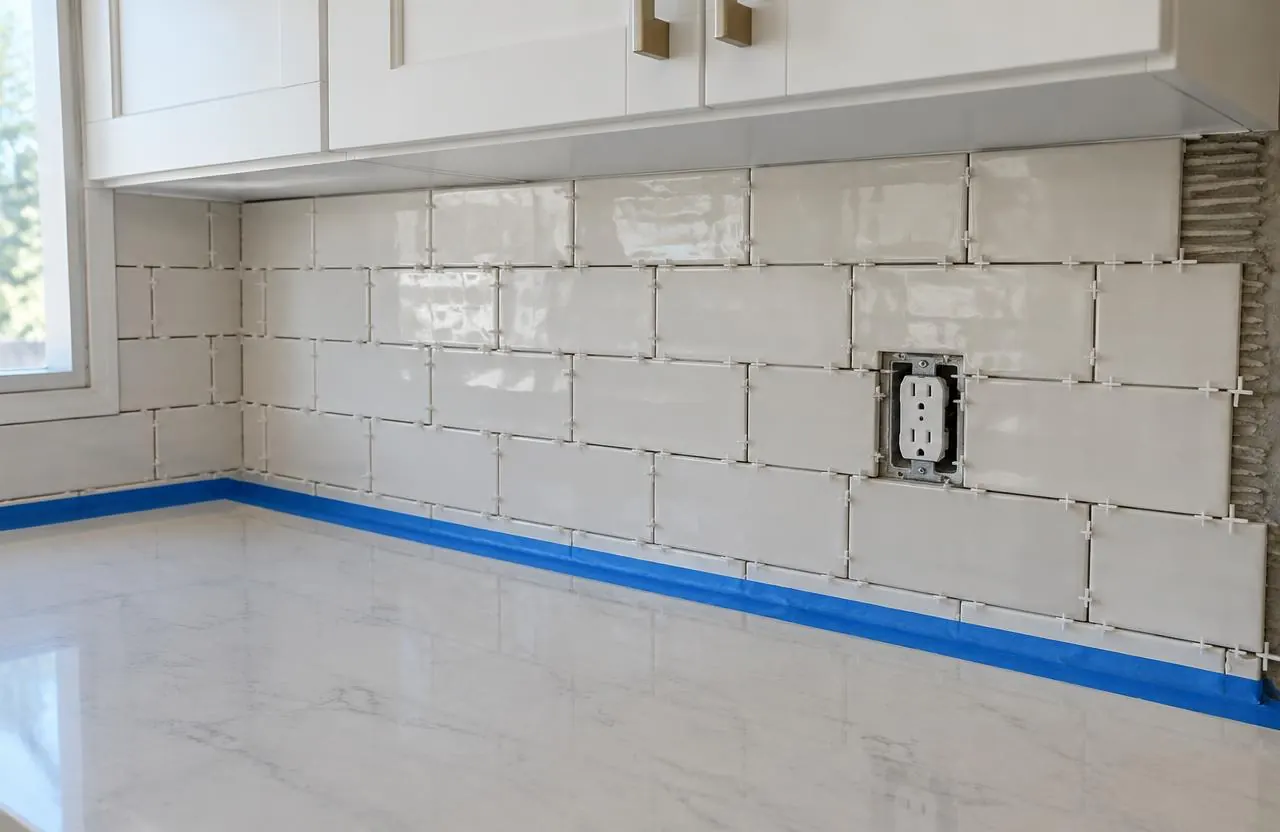
What a backsplash installation includes
A backsplash is a small area with many details. The work typically covers the wall from countertop to upper cabinets, sometimes to the ceiling behind open shelving or a range hood, and the vertical edges where tile stops.
- Wall preparation: flat, clean, primed or repaired drywall
- Layout and centring on the range, sink or window
- Cutting around outlets, switches and under-cabinet lighting
- Edge trims or finished tile edges
- Grout and a flexible sealant where tile meets the countertop
- Protection of countertops, cabinets and appliances
Before or after countertops?
Backsplash tile normally goes in after the countertops are installed so the first row sits on the finished counter surface. Countertops are templated after base cabinets are set, so the sequence is cabinets, countertop template, countertop installation, then backsplash. The joint between countertop and tile is a change of plane and should be filled with flexible sealant, not grout.
This sequence is part of planning kitchen renovations, where countertop lead times often set the schedule for the backsplash.
Outlets and electrical boxes
Adding tile brings the wall surface forward, so outlet and switch boxes may need box extenders to bring the device flush with the new surface. Under-cabinet lighting and new outlet locations are coordinated with a licensed electrical contractor; electrical work in Ontario falls under the Electrical Safety Authority. GCO does not ask homeowners to modify wiring.
Edges, windows and the range
Where the backsplash stops matters as much as the field. Common choices are metal or PVC edge trims, bullnose tile, or ending at the cabinet line. Window returns need either tile on the return or a trim to finish the edge. Behind a range, plan for cleaning, heat and how the tile meets the hood or open wall above.
Choosing backsplash materials
A backsplash takes splashes, grease and cleaning rather than foot traffic, which opens more options than a floor.
| Material | Notes |
|---|---|
| Ceramic subway or field tile | Wide colour range; easy to cut; handmade-look tiles vary in thickness and need careful setting |
| Porcelain | Durable and low-absorption; large slabs and panels reduce grout lines |
| Glass | Reflective; needs white or approved setting material so it does not show through |
| Natural stone | Usually needs sealing; marble etches with acidic foods |
| Mosaic sheets | Fast to cover area but many grout joints to clean |
Grout, sealing and cleaning
Narrow grout joints are common on backsplashes and are often unsanded or pre-mixed grout. Cementitious grout benefits from sealing to resist grease and staining; epoxy grouts resist stains better and need no sealer but are less forgiving to apply. Wipe grease regularly with a non-abrasive cleaner suited to the tile and grout.
Removing an old backsplash
“How to remove tile backsplash” is a common search because removal is messier than it looks. Tile set with mortar or adhesive usually tears the drywall face, so the wall often needs patching or new drywall before the new tile goes on. The countertop is protected throughout, and any outlet changes are coordinated at the same time.
What shapes backsplash cost
A small area can still involve many cuts.
- Linear length and height of the backsplash
- Tile size and pattern; herringbone and mosaics take longer
- Number of outlets, switches and windows to cut around
- Edge trims and returns
- Removal and drywall repair
- Grout type and sealing
Common questions
Should the backsplash go in before or after countertops?
Usually after. The tile sits on the finished countertop, and the joint between them is filled with flexible sealant rather than grout.
How long does backsplash tile installation take?
Many kitchens take one to two working days for setting and grouting, depending on size, pattern and cuts. Removal and drywall repair add time.
Do outlets need to be changed for a backsplash?
Often the boxes need extenders so devices sit flush with the tile. Any electrical changes are coordinated with a licensed electrician.
Can tile go over an old backsplash?
It is possible in limited cases, but it thickens the wall at outlets and edges. Removal and wall repair usually give a cleaner result.
Does a backsplash need to be sealed?
Cementitious grout and natural stone usually benefit from sealing. Glazed ceramic and porcelain tiles do not need it themselves.
Where should a backsplash end?
Common stopping points are the end of the upper cabinets or the countertop edge, finished with a trim or bullnose tile. Plan this before tiling starts.